Pipeline Notifications
Every pipeline run ends in one of two ways: the document is signed and delivered, or it fails somewhere along the way. This page shows how to control who hears about each outcome, how to send different teams different alerts, and how to customize the "signed and delivered" email your recipients receive.
Pipelines are an Enterprise feature. If you don't see the option to create one, Contact us to enable it for your organization.
You set default notifications on the Destination step (labeled Deliver in the wizard's progress rail), and per-store overrides on the Extract & Route step. If you haven't built a pipeline yet, start with Creating an E-Signature Pipeline and come back here to fine-tune the alerts.
Default Notifications
The Default notifications section defines two recipient lists that apply to every document the pipeline handles:
- Signed & delivered: who gets an email once a document is signed and filed in its destination. This list is optional. Leave it empty if nobody needs a success confirmation.
- Failed: who gets an alert when a document can't be processed. At least one address is required here, so a failure always reaches someone.
Type an address into either box and press Enter to add it. Each address becomes a removable chip, so you can build a small distribution list for each outcome.
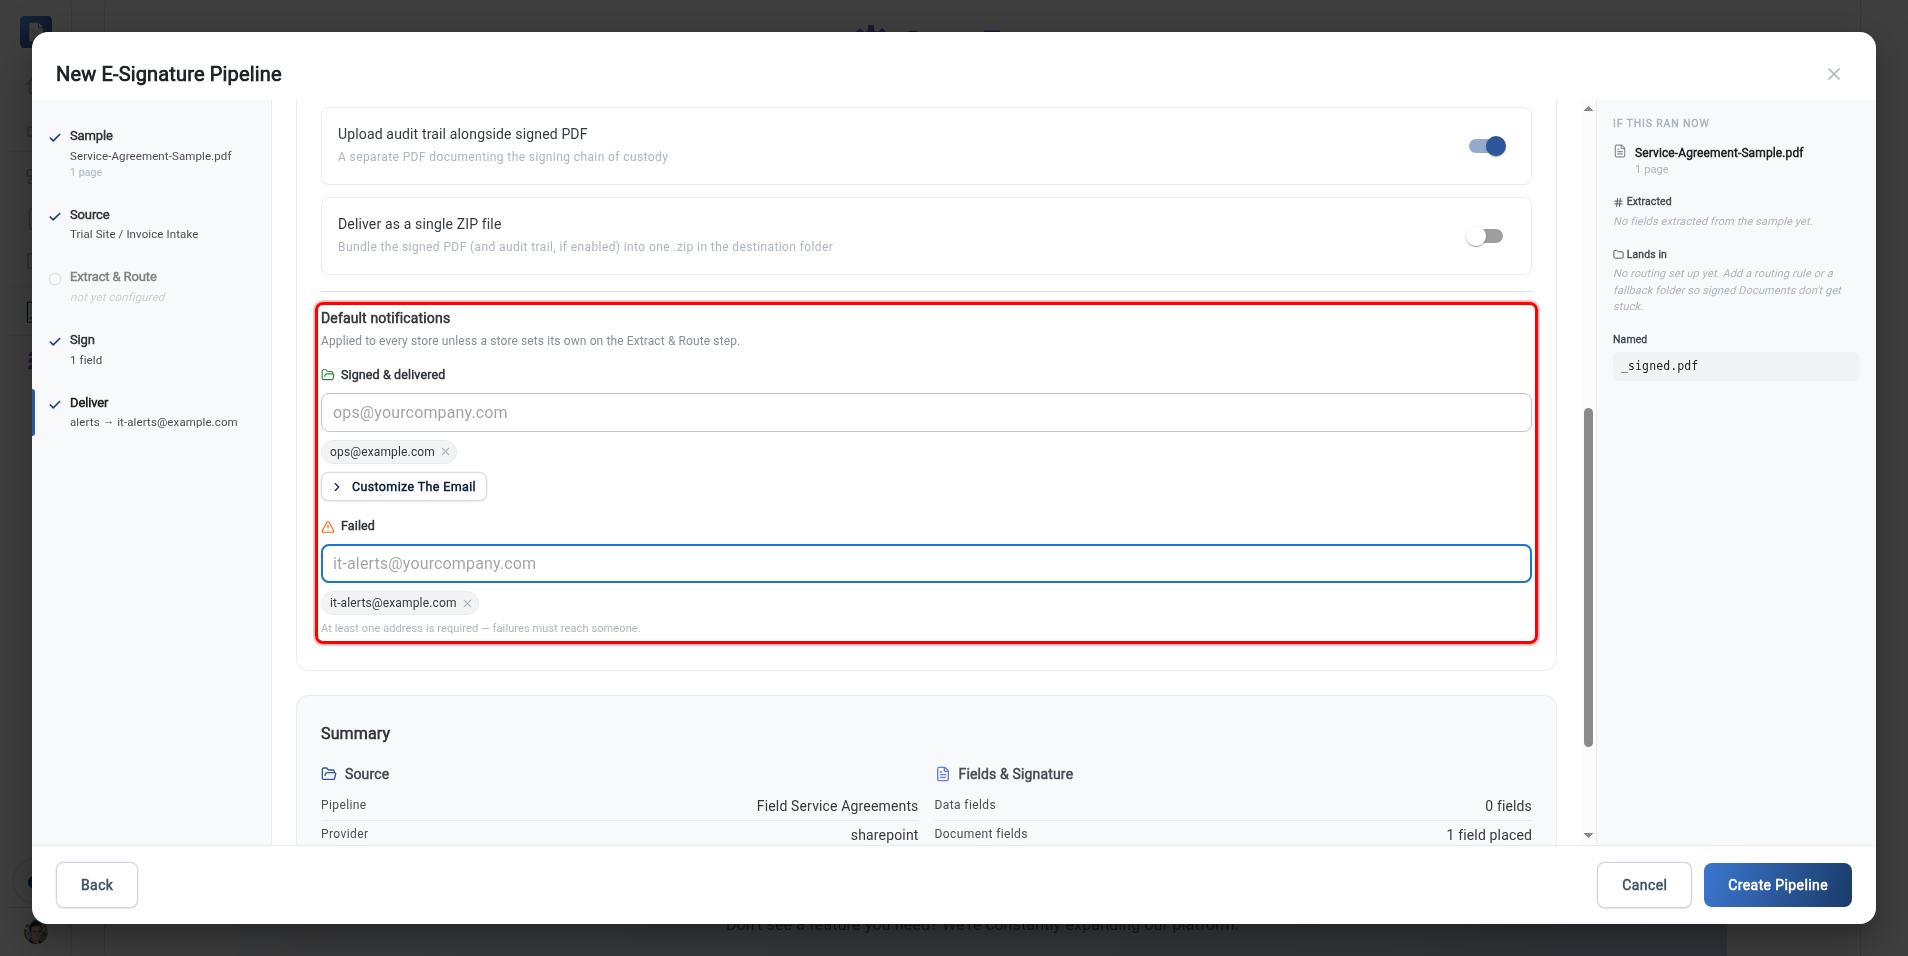
Point the Failed list at a shared inbox or ticket queue your team actually watches, not a single person's mailbox. That way an alert is never missed because someone is out of office.
Customize the Completion Email
By default, the "signed and delivered" email uses a standard subject and body. To tailor it, click Customize the email under the Signed & delivered list.
You can set:
- Subject line: the subject recipients see. Leave it blank to use the default.
- Message: a short note shown above the run details. Leave it blank to use the default.
- Attach the signed document and audit trail (ZIP): turn this on to attach the signed PDF and its audit trail to the email as a single ZIP file.
To drop live values into the subject or message, use the Insert a field chips below each box. Available fields include the pipeline name, the signed file name, and the run ID, so a subject like Your signed agreement is ready: {pipelineName} fills in automatically for each run.
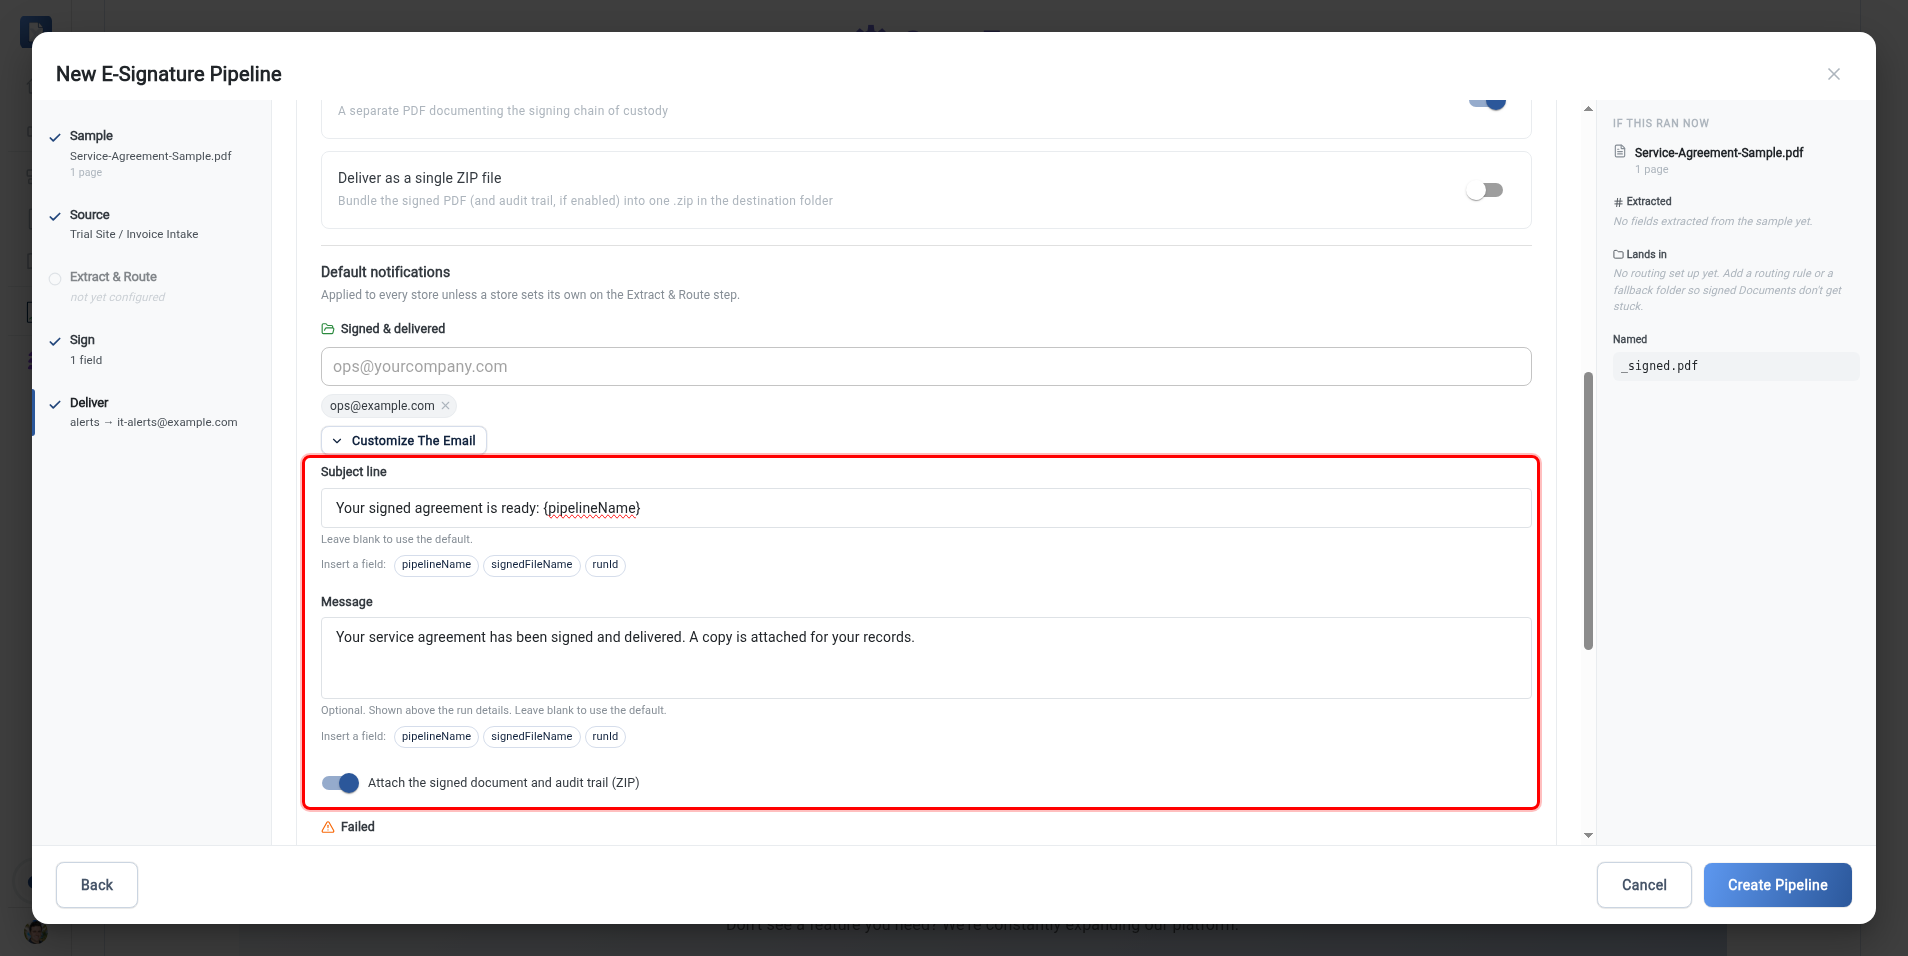
If the ZIP attachment is too large to email, the completion email is still sent without the attachment so the notice always gets through. The signed document always lands in its destination folder regardless of the email.
Per-Store Notifications
If your pipeline uses routing rules on the Extract & Route step, each routing rule is a "store" (for example, one region or one business unit). You can give any store its own recipients instead of the pipeline defaults.
Each routing rule has a Notify chip. It reads Default when the store uses the pipeline's default notifications, and Custom once you override it.
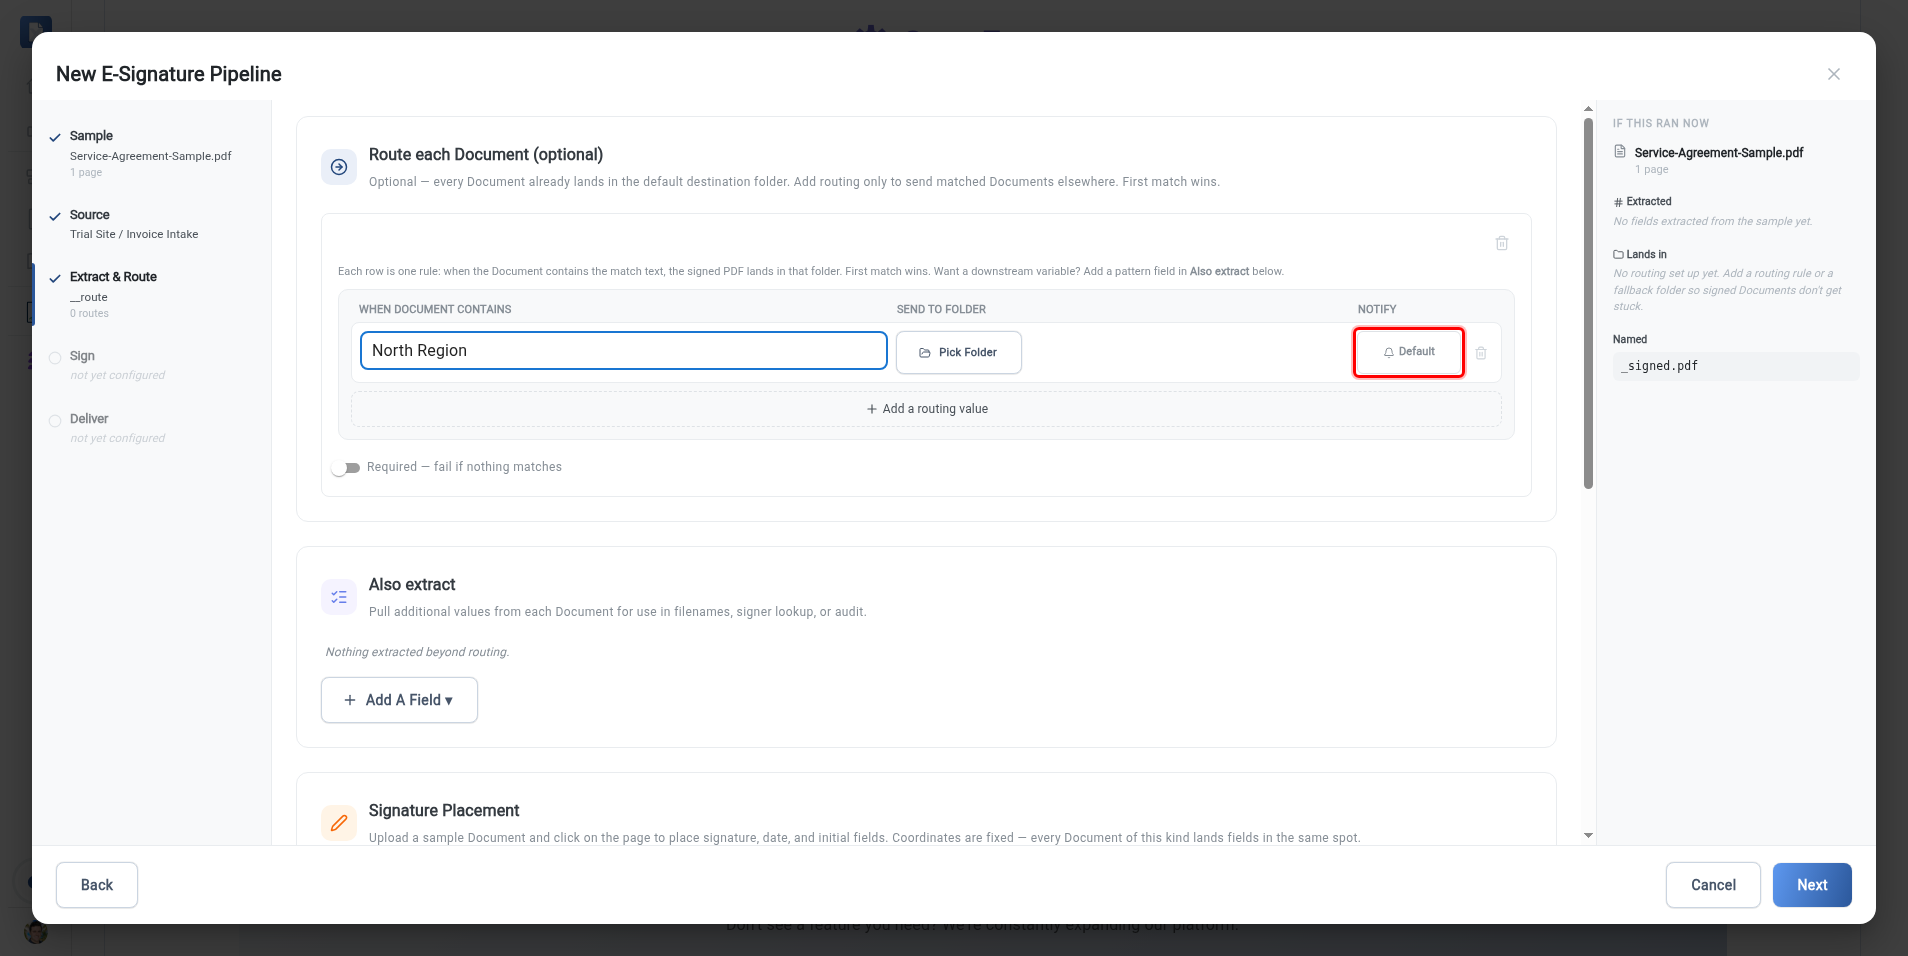
Click the Notify chip to open the Store notifications panel for that store. For both Signed & delivered and Failed, choose:
- Use pipeline default: this store inherits the recipients you set in Default notifications.
- Custom recipients: only the addresses you enter here are notified for this store.
Enter each address and press Enter, then click Save. If you leave a custom Failed list empty, that store falls back to the default failure recipients, so failures always reach someone.
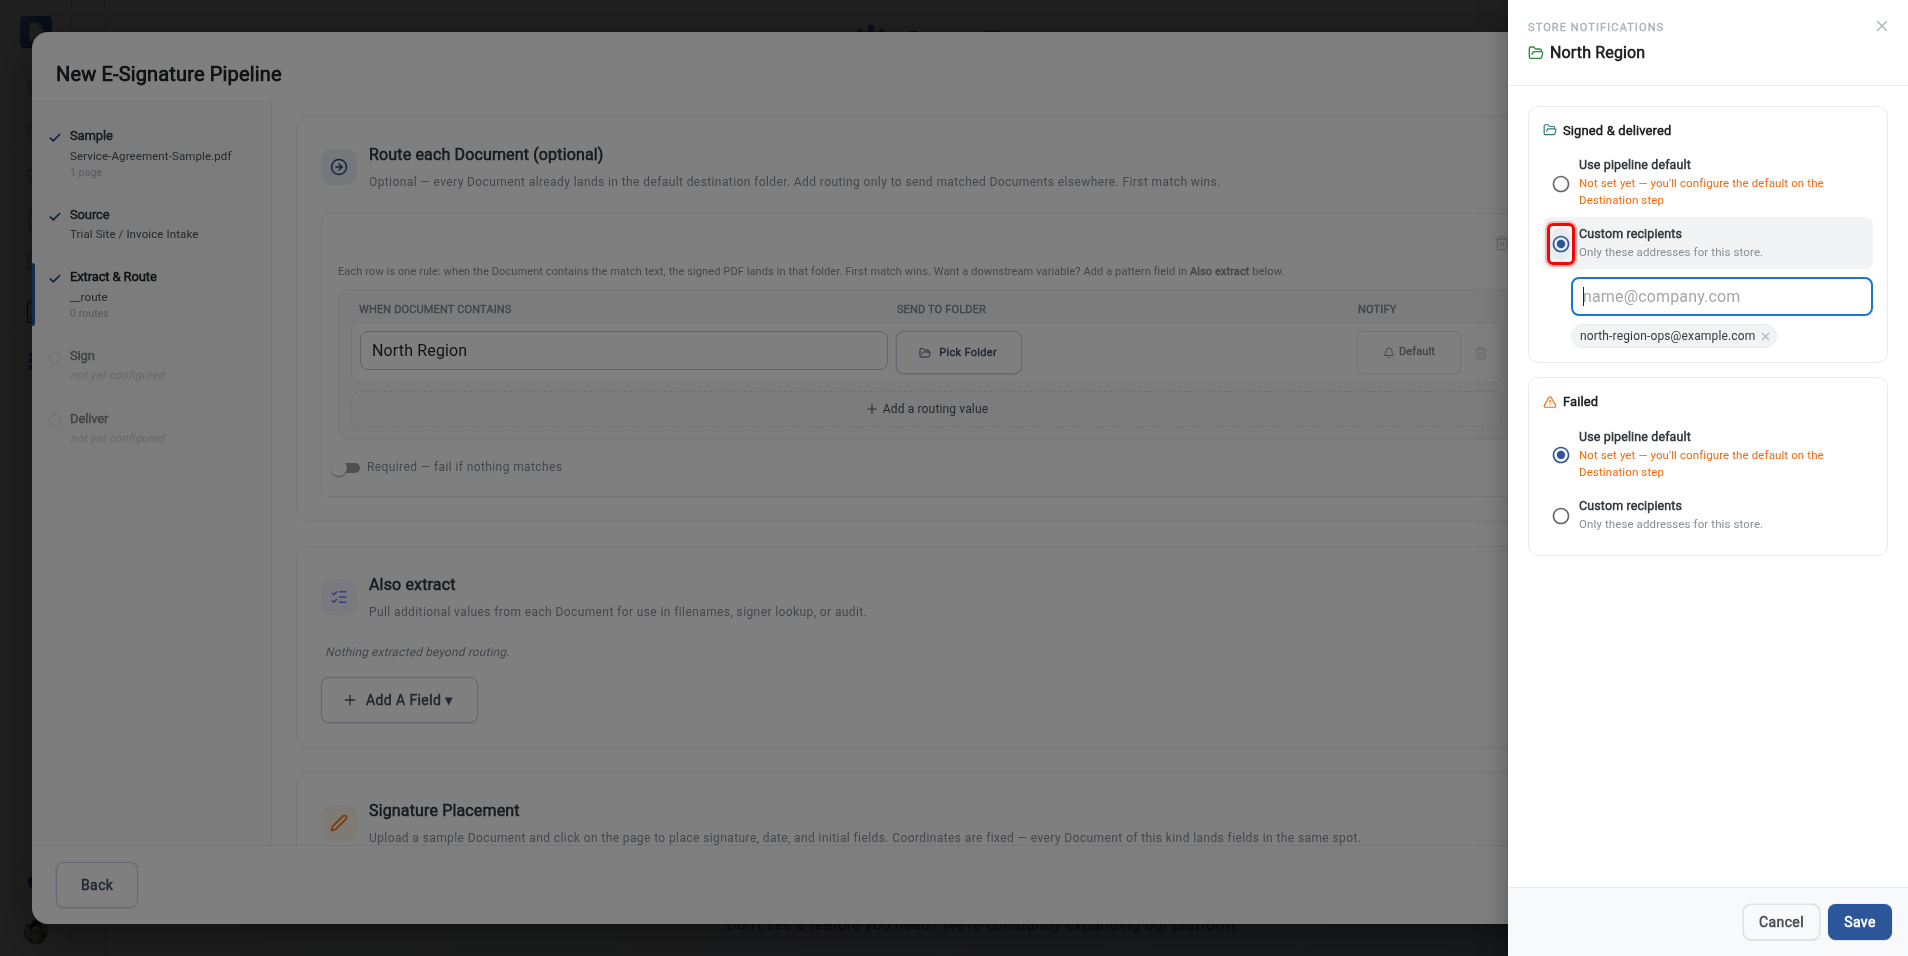
Per-store notifications are useful when different regions, branches, or departments each manage their own documents. Send each store's alerts to the people who actually act on them, and keep the pipeline defaults for everything else.
What's Next?
- Creating an E-Signature Pipeline: build the pipeline these notifications belong to.
- Field Extraction: define the routing fields that create per-store rules.
- Cloud Connectors: resolve signers from your own internal systems.